

This is the first post on my new blog. I’m just getting this new blog going, so stay tuned for more. Subscribe below to get notified when I post new updates.
Before starting with Azure integrations with Microsoft Dynamics 365 lets have an overview on Azure functions.
Azure Functions are part of the Azure Web and Mobile suite of App Services and are designed to enable the creation of small pieces of meaningful, reusable methods, easily shared across services. You can build the Azure Function in various languages like Node.js, C#, F#, Python, PHP, and even Java . You can refer this link for further information on Azure Functions.I am going to demonstrate on C# with trial instance.
Software Requirement–Visual Studio 2019
- Open Visual Studio > Create a New Project >Search Azure Function

2. Provide valid project name as per your requirement

3. Select HTTP Trigger & select .NET Framework in the above drop down.

4. A default project will open with example Code for html trigger.Please Log into your microsoft account in Visual studio to directly connect to the Azure Portal.
5. Replace the default code with the below code , this code will basically read the html request from CRM and log it in Azure logs.
using System.Net;
using System.Net.Http;
using System.Threading.Tasks;
using Microsoft.Azure.WebJobs;
using Microsoft.Azure.WebJobs.Extensions.Http;
using Microsoft.Azure.WebJobs.Host;

namespace reycrmtest
{
    public static class Function1
    {
        [FunctionName("Function1")]
        public static async Task<HttpResponseMessage> Run([HttpTrigger(AuthorizationLevel.Function, "get", "post", Route = null)]HttpRequestMessage req, TraceWriter log)
        {
            log.Info("C# HTTP trigger function processed a request.");
              // Get request body
                string data = await req.Content.ReadAsStringAsync();
            //log request body
            log.Info(data);


            return req.CreateResponse(HttpStatusCode.OK);

        }
    }
}
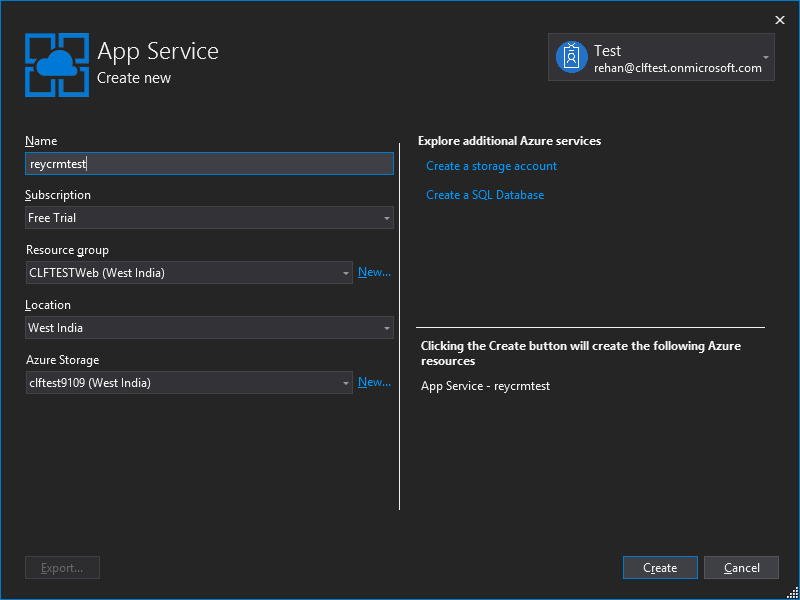
6. Now rebuild the code > Right click on the project and click on publish >Click on start in Publish section.A dialog will pop up with azure license plan I am using consumption plan for my trial instance . Mark the create new check box and run from package as shown below.

7.Fill in the details as per your preferred choice.Click on create.This will take few minutes to deploy your function App on azure portal. (As this is the first time we are creating a Azure function we need to create a function App to deploy this function in the app the above steps were to create a function App).Once the process is completed it will start publish automatically.Now you can open Azure portal with same login credentials used in visual studio.
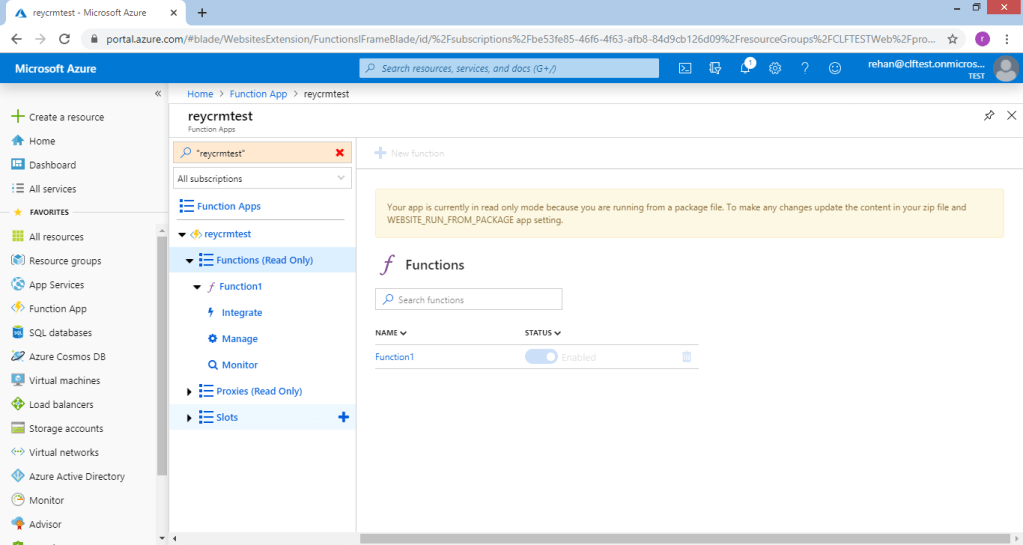
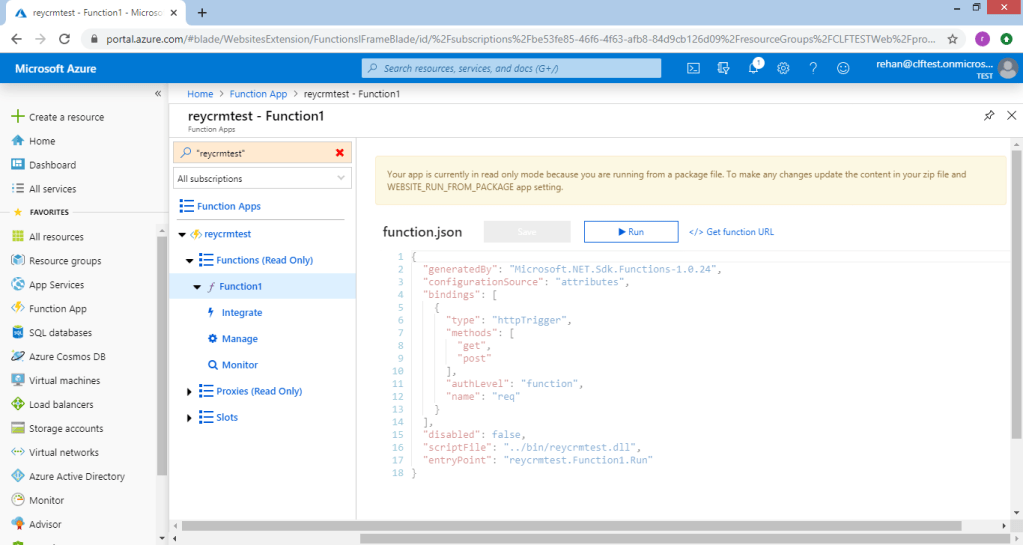
8. You can navigate to functions in azure portal from the left navigation drawer.As you can see in the below screenshot our reycrmtest App is created on Azure portal.
Click On your function App where you can see your test function is deployed.Refer below Screen shots.

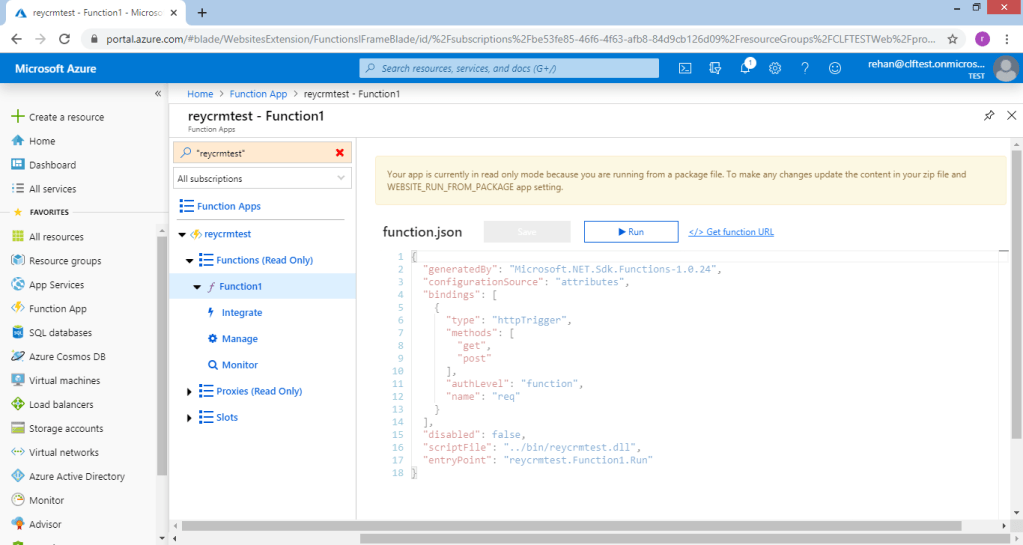
9. Click On function1 to see function.json. It will be in readonly mode as we have deployed the function from Visual studio Cloud service .Get the function URL besides Run button and paste it on notepad.We will use this URL while registering Webhook.

10. Now open PRT (plugin registration tool) and login to the instance where you want to register the webhook.


11. A new dialog will open with webhook details. Open Notepad file where you have pasted the URL of the function copied in STEP 9 .
Authentication options
The correct webhook registration authentication option and values to use depend on what the endpoint expects. The owner of the endpoint must tell you what to use. To use webhooks with Dynamics 365, the endpoint must allow one of the three authentication options described below:
| Type | Description |
|---|---|
| HttpHeader | Includes one or more key values pairs in the header of the http request. Example: Key1: Value1Key2: Value2 |
| WebhookKey | Includes a query string using code as the key and a value required by the endpoint. When registering the web hook using the Plug-in Registration tool, only enter the value.Example: ?code=00000000-0000-0000-0000-000000000001 |
| HttpQueryString | Includes one or more key value pairs as query string parameters. Example: ?Key1=Value1&Key2=Value2 |
https://reycrmtest.azurewebsites.net/api/Function1?code=Y4a0tWmc39ZLyPhPZFMmAPcfa3CNyHKOZi4mHvjeHYzMJIM5u5OYfg==
The part in code (marked in bold, remove ‘code=’) will be your webhook key and Endpoint url will be upto ‘?’ .Please refer below screen shot.

Register a step for a webhook
Registering a step for a webhook is like registering a step for a plugin. The main difference is that you cannot specify any configuration information.
Just like a plugin, you specify the message, and information about entities when appropriate. You can also specify where in the event pipeline to execute the web hook, the execution mode and whether to delete any AsyncOperation when the operation succeeds.Refer below screent shot.


Create Record in CRM instance
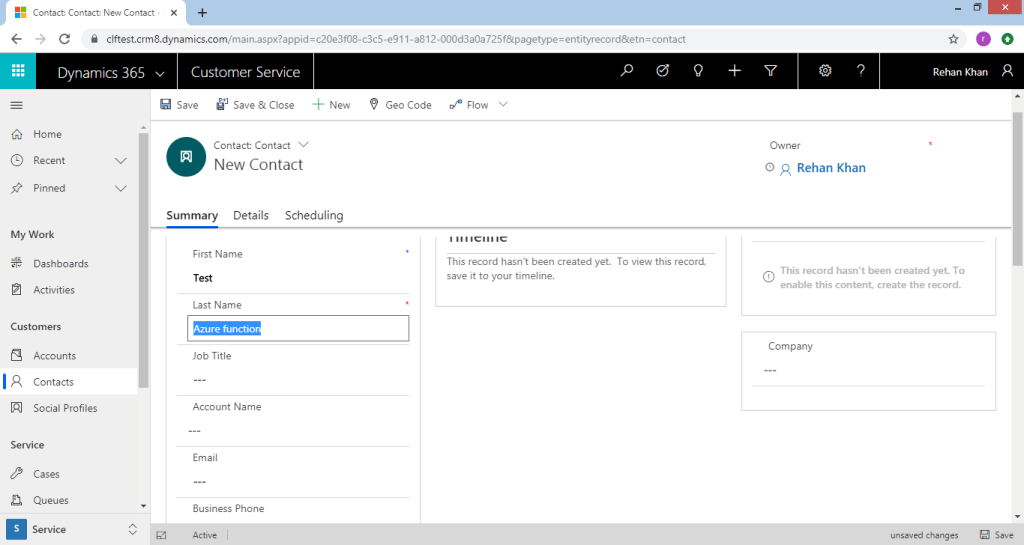
Now navigate to the CRM instance and create (or perform the step as per your registration) a record. I have created a contact record in my instance as shown below.
Once I create a contact record the webhook gets triggered and CRM httprequest is passed in the azure function.You can check the trigger in System Events if the step is registered in async mode same as for plugins.
Azure Function Logs
Azure functions provides us with logging feature. To check these logs you can navigate to the Azure portal where we have registered the function App as in Step 8.
Refer below screenshot
Click on monitor in your function to track the triggered events of your function. We can see all the logs as below.

  log.Info("C# HTTP trigger function processed a request.");
  string data = await req.Content.ReadAsStringAsync();
  log.Info(data);
As per the above code in our azure function we are logging “C# HTTP trigger function processed a request.” and the request body which contains all the parameters of the Created record in crm & logs are available in the logs section in the bottom right corner as shown in the above screenshot. This shows the connection of azure function with ms crm using webhooks. I will be demonstrating how to use the json object in our code for CRUDE operation using executioncontext in my next blog.
Hope it helps …………………………… 🙂 Do share it !!!!

One thought on “Azure Integration With Dynamics 365 using Web hook”