Most used functions in javascript UCI supported.

In this blog i am going to share some very common functions used in dyamics 365.After the deprecation of javascript utilities like Xrm.Page all the javascript implementations needs to be updated with executioncontext .I will demonstrate first example in brief to explain you how to use these functions .Lets discuss these functions one by one below.

  1. Get Value of an attribute GetValue()
function GetValue(formContext, formAttr) {
        try {
            return formContext.getAttribute(formAttr).getValue();
        } catch (e) {
            Alert(e.message + " - " + formAttr);
            return null;
        }
    }

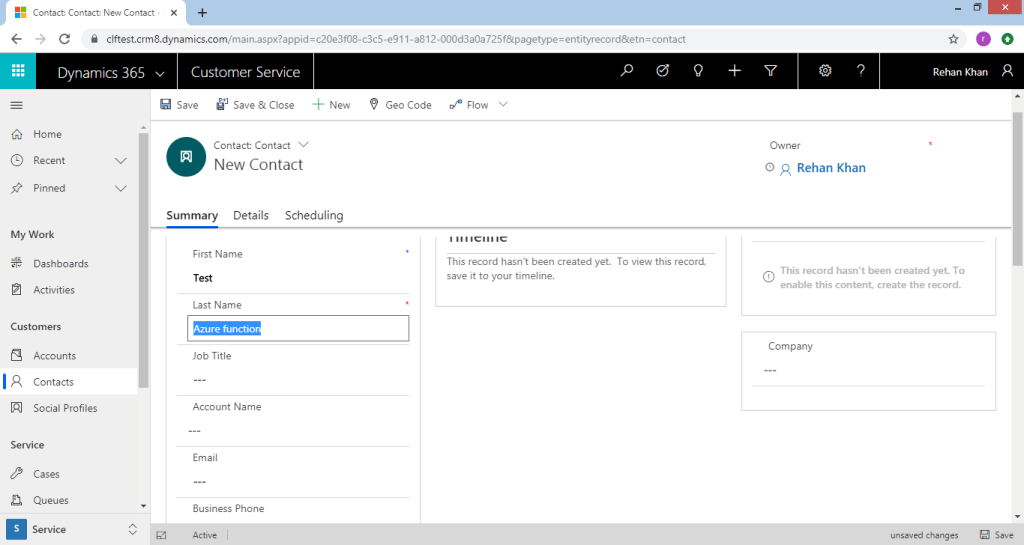
The above function takes two input parameters formcontext and formAttr . Formcontext is executionContext.getFormContext(); where executioncontext is the passed parameter on function call.As shown in below screenshot check the execution context flag.

function performsomeaction(executionContext) {
var formContext = executionContext.getFormContext();
var namevalue=Getvalue(formContext,"formAttr");
// logic to lock fields on the basis of value 
}

In the above code i have demonstrated the use of Getvalue function in performsomeaction function. This will return us the value of the attribute passed.

2.Set Value of an attribute SetValue()

 function SetValue(formContext, formAttr, value) {
        try {
            formContext.getAttribute(formAttr).setValue(value);
        }
        catch (e) {
            Alert(e.message + " - " + formAttr);
        }
    }

The above function takes three input parameters formcontext ,formAttr same as the first function and value contains value to be set for the given attribute. This function will set the value of the atribute as per the value provided in the parameter.This is not used for lookup values as lookup values takes array as an input.

3. Set value of a Lookup SetLookupValue()

function SetLookupValue(formcontext, fieldName, id, name, entityType) {
             if (fieldName != null) {
            if (id.indexOf('{') === -1)
                id = '{' + id;
            if (id.indexOf('}') === -1)
                id = id + '}';
            id = id.toUpperCase();
            var lookupValue = new Array();
            lookupValue[0] = new Object();
            lookupValue[0] = {};
            lookupValue[0].id = id;
            lookupValue[0].name = name;
            lookupValue[0].entityType = entityType;

            formcontext.getAttribute(fieldName).setValue(lookupValue);

        }

The above function takes 5 input parameters that is formcontext,fieldname,id,name and entitytype. First two parameters are common as above where as id is the lookup record guid to set,name is the name of the lookup record with corresponding id and entitytype is the name of entity of which the lookup record belongs to. SetLookupValue(formcontext,”lookupname”,GUIDoftherecord,”Record name”,Testentity);

4.Set filter to a Lookup Addfilter()

function Addfilter(formContext, fetchquery, formAttr) {
        try {
            formContext.getControl(formAttr).addCustomFilter(fetchquery);
        } catch (e) {

            Alert(e.message + " - " + formAttr);
        }

    }

The above function takes 3 input parameters formcontext,formAttr and fetchquery.
Formcontext and formattr are the common parameters that is the executioncontext and attribute name where as fetchquery is the filter condition for that lookup.

5.Hide / Show Field HideShowField()

function HideShowField(formContext, formAttr, bool) {
            try {
                formContext.getControl(formAttr).setVisible(bool);
            }
            catch (e) {
                Alert(e.message + " - " + formAttr);
            }
        }

The above function is used to hide or show a particular field. It takes 3 input parameters
formcontext,formAttr and bool . The first 2 parameters are common parameters where as bool is the true or false value used to hide or show the attribute. Pass true in case you want to show a hidden field and pass false if you want to hide a field.

6.Hide or Show Section HideShowSection()

 function HideShowSection(formContext, section, tab, bool) {
        try {
            formContext.ui.tabs.get(tab).sections.get(section).setVisible(bool);
        }
        catch (e) {
            Alert(e.message + " - " + section);
        }
    }

The above function is used to hide or show a section on the form.It takes 4 input parameters formContext which is the formcontext ,section is the name of the section,tab is the name of the tab under which the section is and bool has true or false.If you want to hide the section you can pass false and and if you want to make the section visible you can pass true. HideShowSection(formContext, sectionname, tabname, true) will be used to hide .

7.Hide or Show Tab hideshowtab()

function hideshowtab(formContext, tab, bool) {
        try {
            formContext.ui.tabs.get(tab).setVisible(bool);
        }
        catch (e) {
            Alert(e.message + " - " + section);
        }
    },

The above function is used to hide a tab on form. It takes 3 input parameters fromcontext, tab which will be the name of the tab and bool that is true or false.

8.Lock Unlock Fields Lockfields()

function Lockfields(formContext, fieldAttr, bool) {
        try {
            formContext.ui.controls.get(fieldAttr).setDisabled(bool);
        }
        catch (e) {
            Alert(e.message + " - " + fieldAttr);
        }

    }

The above function is used to lock or unlock fields on form.It takes 3 input parameters formcontext, fieldAttr and bool which will be the true or false.Use true to lock the fields and false to unlock the fields.

9.Set fields Mandatory/Non Mandatory

  function setrequiredlevel(formContext, formAttr, level) {
        try {
            formContext.getAttribute(formAttr).setRequiredLevel(level);
        }
        catch (e) {
            Alert(e.message + " - " + formAttr);
        }

    }

The Above function is used to set the requiredlevel of the field.It takes 3 parameters as input formcontext,formAttr and level where level can be as below three –

  • none – It is used to set a field non mandatory
  • required-It is used to set a field mandatory
  • recommended-It is used to set a field business recommended

You can use the above parameters in level to set the required level of the field.

10.Alert function Alert()

Alert(displayMessage) {
        Xrm.Navigation.openAlertDialog(
            {
                confirmButtonLabel: "OK",
                text: displayMessage
            },
            {
                height: 150,
                width: 300
            });
    }

The above function is used for Alert Pop . It takes on input parameter displayMessage which is the message which is to be displayed.
As you can see all the functions above i have used this Alert function in catch block for exception.
The above function can used in one global javascript file and can be used in all the forms as per your requirement.
Hope this helps you and Thank you for reading ……………. 🙂
You can connect me on LinkedIn.


Dynamics 365 Record Clone Button for UCI Quick trick

After writing few blogs on integrations with dynamics CRM , i thaught of sharing something i achieved for one of my client requirement. A clone button can be used to reduce data inputs by user and do minor changes to the records to create another record.It can be used for any of the entity whereas i have used it for Leads in sales module for lead cloning.
This will require basic knowledge of javascript.

1. function leadClone(executionContext) {
2.     //debugger;
3.     "use strict";
4.     var entityFormOptions = {};
5.     //Entity Form Options 
6.   entityFormOptions["entityName"] = "lead"; // Replace the entity name as per you requirement
7.     entityFormOptions["openInNewWindow"] = true;
8.     var formParameters = {};
9.     executionContext.data.entity.attributes.forEach(
10.         function (attribute, index) {
11.             var attributeName = attribute.getName();
12.             var attributetype = attribute.getAttributeType();
13.             var attrvalue = attribute.getValue();
14.             if (
15.                 attributeName === 'ATT1' ||     // The attributes value which you want to pass
16.                     attributeName === 'ATT2 ' ||
17.                     attributeName === 'ATT3'
18. 
19.             ) {
20.                 if (attributetype === "lookup") {
21.                     if (attrvalue !== null) {
22.                         if (attrvalue[0].id !== null) {
23.                             var regObj = {};
24.                             regObj.entityType = attrvalue[0].entityType;
25.                             regObj.name = attrvalue[0].entityType.name;
26.                             regObj.id = attrvalue[0].id;
27.                             formParameters[attributeName] = attrvalue;
28.                         }
29.                     }
30.                 }
31. 
32.                 if (attributetype === "boolean") {
33.                     formParameters[attributeName] = attrvalue;
34.                 }
35.                 if (attributetype === 'datetime') {
36.                     formParameters[attributeName] = attrvalue.toDateString();
37.                 }
38.                 if (attributetype === 'optionset') {
39.                     formParameters[attributeName] = attrvalue;
40.                 }
41.                 if (attributetype === 'string') {
42.                     formParameters[attributeName] = attrvalue;
43.                 }
44. 
45.             }
46. 
47.         });
48.     Xrm.Navigation.openForm(entityFormOptions, formParameters);
49. }

The above code needs to be registered on the ribbon button click of the clone button.

Understanding the code

Lets discuss some features used in above code.

EntityFormOptions- Entity form options for opening the form. The object contains the following attributes:entityName: String. Logical name of the entity to display the form for.entityId: (Optional) String. ID of the entity record to display the form for.formId: (Optional) String. ID of the form instance to be displayed.cmdbar: (Optional) Boolean. Indicates whether to display the command bar. If you do not specify this parameter, the command bar is displayed by default.createFromEntity: (Optional) Lookup. Designates a record that will provide default values based on mapped attribute values. The lookup object has the following String properties: entityTypeid, and name (optional).height: (Optional) Number. Height of the form window to be displayed in pixels.navbar: (Optional) String. Controls whether the navigation bar is displayed and whether application navigation is available using the areas and subareas defined in the sitemap. Valid vlaues are: “on”, “off”, or “entity”.on: The navigation bar is displayed. This is the default behavior if the navbar parameter is not used.off: The navigation bar is not displayed. People can navigate using other user interface elements or the back and forward buttons.entity: On an entity form, only the navigation options for related entities are available. After navigating to a related entity, a back button is displayed in the navigation bar to allow returning to the original record.openInNewWindow: (Optional) Boolean. Indicates whether to display form in a new window.

The above code uses Navigation utility of CRM to open create form of the entity.
On line 4 we are defining entityoptions object and passing entity name and windows options (line 6,7).

After setting the entity level parameters we will define formparameters. Formparameters are used to set attribute value in the preceding forms.In the above code we are fetching all the attributes details of the current form in a foreach loop maintaining a seperate condition for the datatypes available in CRM.

As you can see on line 15 I have implemented a condition where i need to add which all attributes needs to be cloned . You can remove that condition but remember it will clone owner value and createdon, modified on etc which might create problems.
You can use this piece of code on change of field, button click, on save or any other triggers suitable for your requirement.
So this was a quick cool tip to clone records without setting hardcoded values in the code.
Hope this helps you , Thanks for reading .

You can connect me on LinkedIN


API integration In Ms Dynamics Crm using Ms Flows (online)

Lets have an overview of API integration and MS Flows (online version).

WHAT IS API INTEGRATION?

An application programming interface (API) is a messenger that processes requests and ensures seamless functioning of enterprise systems. API enables interaction between data, applications, and devices. It delivers data and facilitates connectivity between devices and programs.

API can also be defined as an online programming interface of the organization. It allows applications to communicate with backend systems.

An application programming interface creates a channel for the company to sell its products and services online. API enables access of services by adding codes to applications. It further enhances connectivity and bolsters functionality.

APIs ensure a seamless communication between various applications. But, it is so done by exposing limited amount of a program’s internal functions. For example, an app like Zomato is enabled by API to show the restaurant locations on Google Maps. So, in other words, API integration eases businesses and benefits consumers.

What is Microsoft Flows ?

Microsoft Flow is an online workflow service that automates actions across the most common apps and services. For example, you can create a flow that adds a lead to Microsoft Dynamics 365 and a record in MailChimp whenever someone with more than 100 followers tweets about your company.

What can you do with Microsoft Flow?

You can use Microsoft Flow to automate workflows between your favorite applications and services, sync files, get notifications, collect data, and much more.

For example, you can automate these tasks:

  • Instantly respond to high-priority notifications or emails.
  • Capture, track, and follow up with new sales leads.
  • Copy all email attachments to your OneDrive for Business account.
  • Collect data about your business, and share that information with your team.
  • Automate approval workflows.

In this blog i will demonstrate how we can generate a GET request and update crm record with API response.
I will be demonstrating the same on trial instance with a trial API below are the API details.

URL- https://jsonplaceholder.typicode.com/todos/1

Response on GET for this API

{  "userId": 1,  "id": 1,  "title": "delectus aut autem",  "completed": false}

In the above response we get 4 parameter in response in which we will stamp “title” on job title field in contact on creation of contact.
Lets start with flow creation on http://flow.microsoft.com/ log in with your Dynamics user credentials.You will land on homepage as below.

Click On My Flows on left navigation bar and select new automated flow as shown below.

Now you can type-in the name of your flow and choose the trigger point for the flow, here i am triggering the flow on create of record (Dynamics 365 connector). There are 2 trigger available in which one is in preview mode you can select any one of them.Once you click on create button you can see flow designer.

On trigger component you can select Instance (in case you have sandbox and production instance ) & Entity (on which you want to trigger the flow).Here I have selected my test instance and contact entity .

Add HTTP step which will trigger an API request to the URL. Click on new step and type HTTP. Now select HTTP [premium] which is a premium flow plan you will get the plan details here .HTTP actions are designed to manage HTTP requests in flow.

In the above screenshot you can see HTTP action to be filled with API details
Method- GET,POST, PUT (or as per your request)
URL-API URL
Headers-(if any )
Queries-If any
Body-Request json .
In my test API i am passing method as GET and a blank request.
After performing the above steps FLOW will execute this API request,but to capture the response from API we will parse the response structure.Add new step and select parse json action.

Select body from HTTP for the content to parse and add the sample response of API to create Schema.Click on Use sample payload to generate schema in the left corner .

It will automatically generate shcema based on the sample payload values passed.
As shown in the screenshot below.

Now I will update job title of the contact with the tittle received from API response.
Add new step , update record action from dynamics365 assembly.

Select your environment following that select the entity which you want to update that is contact in this example.There is a mandatory field record identifier which requires the GUID of the record you want to update .Here we will pass unique identifier record of contact which will be originated from create step as shown in the above screenshot.
Now you can see all the fields of contact (click on show advance option on the bottom left corner) .

You will get the parsed attributes from the parse json component.As shown in the above screenshot i am updating the job title field on contact record with tittle received from API .You can map the fields as per your requirement to the record field.
Now i will create a test record and check.

After refreshing the from job title is stamped on the record.

We can check the logs for all the execution in flow.Navigate to My Flows>Select your flow(I am selecting Test contact creation)

It might take some time for the flow to be visible in the logs. As shown in the above screenshot click on the logs as per the records created on time to check the the log of that particular record.

Title received from API

As shown in the above screenshot in HTTP component title is stamped.This is how we can integrate API on CRM steps. Thank you for reading my blog, feel free to contact me at rehanreyk@gmail.com for any query. All the best………. 🙂


Azure Function integration Ms Dynamics Crm (Using remote execution context)

In this blog I will try to demonstrate further steps after connecting our dynamics CRM instance to Azure functions using webhooks. You can refer my first blog to get step by step guide on Azure functions with dynamics 365 here.Now we have the json request of CRM in httprequestmessage req Object as parameter as per the previous blog. The question arises how can we execute azure function under CRM context like we do in plugin?

Read JSON data from the Httprequestmessage :

When plugin triggers and invokes a WebHook, three types of data received in the request i.e. Query String, Header Data and Request Body. The Request body contains a string that represents the JSON value of the RemoteExecutionContext class. This class defines the contextual information sent to a remote service endpoint at run-time. Below code snippet reads the content from the HttpRequestMessage and converts the received JSON string to proper deserializable JSON string.

Parse JSON string to RemoteExecutionContext object:

Below code snippet deserialize the JSON string to RemoteExecutionContext object.

#r "bin/Newtonsoft.Json.dll"
#r "bin/Microsoft.Xrm.Sdk.dll"
#r "bin/System.Runtime.Serialization.dll"

using System.Net;
using System.Dynamic;
using System.Text;
public static async Task<HttpResponseMessage> Run(HttpRequestMessage req, TraceWriter log)
{
   string jsonContext = await req.Content.ReadAsStringAsync();
   log.Info("Read context: " + jsonContext);

   jsonContext = FormatJson(jsonContext);
   log.Info("Formatted JSON Context string: " + jsonContext);

   Microsoft.Xrm.Sdk.RemoteExecutionContext remoteExecutionContext = DeserializeJsonString<Microsoft.Xrm.Sdk.RemoteExecutionContext>(jsonContext);
}

/// <summary>
/// Function to deserialize JSON string using DataContractJsonSerializer
/// </summary>
/// <typeparam name="RemoteContextType">RemoteContextType Generic Type</typeparam>
/// <param name="jsonString">string jsonString</param>
/// <returns>Generic RemoteContextType object</returns>
public static RemoteContextType DeserializeJsonString<RemoteContextType>(string jsonString)
{
    //create an instance of generic type object
    RemoteContextType obj = Activator.CreateInstance<RemoteContextType>();
    MemoryStream ms = new MemoryStream(Encoding.Unicode.GetBytes(jsonString));
    System.Runtime.Serialization.Json.DataContractJsonSerializer serializer = new System.Runtime.Serialization.Json.DataContractJsonSerializer(obj.GetType());
    obj = (RemoteContextType)serializer.ReadObject(ms);
    ms.Close();
    return obj;
}

In the above code snippet when we pass deserialised json string to the remocontexttype function it returns the remoteexecutioncontext of the plugin depending on which message webhook was registered.
Please Note: Add reference of following dlls,

  • Xrm.Sdk.dll
  • Runtime.Serialization.dll

Now we have the execution context we can read the values as we do for plugins.

//read Plugin Message Name
    string messageName = remoteExecutionContext.MessageName;
    //read execution depth of plugin
    Int32 depth = remoteExecutionContext.Depth;
    //read BusinessUnitId
    Guid businessUnitid = remoteExecutionContext.BusinessUnitId;
    //read Target Entity 
    Microsoft.Xrm.Sdk.Entity targetEntity = (Microsoft.Xrm.Sdk.Entity)remoteExecutionContext.InputParameters["Target"];

    //read attribute from Target Entity
    string phoneNumber = targetEntity.Attributes["telephone1"].ToString();
    log.Info("Message Name: " + messageName);
    log.Info("BusinessUnitId: " + businessUnitid);
    log.Info("Plugin Depth: " + depth);

    log.Info("TargetEntity Logical Name: " + targetEntity.LogicalName);
    log.Info("Phone Number: " + phoneNumber);

The steps given above describes how to Parse JSON string that represents the Dynamics 365 plugin execution context received in Azure Function.Hope this helps and thank you for reading .All the best 🙂

Azure Integration With Dynamics 365 using Web hook

This is the first post on my new blog. I’m just getting this new blog going, so stay tuned for more. Subscribe below to get notified when I post new updates.

Before starting with Azure integrations with Microsoft Dynamics 365 lets have an overview on Azure functions.
 Azure Functions are part of the Azure Web and Mobile suite of App Services and are designed to enable the creation of small pieces of meaningful, reusable methods, easily shared across services. You can build the Azure Function in various languages like Node.js, C#, F#, Python, PHP, and even Java . You can refer this link for further information on Azure Functions.I am going to demonstrate on C# with trial instance.

Software RequirementVisual Studio 2019

  1. Open Visual Studio > Create a New Project >Search Azure Function

2. Provide valid project name as per your requirement

3. Select HTTP Trigger & select .NET Framework in the above drop down.

4. A default project will open with example Code for html trigger.Please Log into your microsoft account in Visual studio to directly connect to the Azure Portal.
5. Replace the default code with the below code , this code will basically read the html request from CRM and log it in Azure logs.

using System.Net;
using System.Net.Http;
using System.Threading.Tasks;
using Microsoft.Azure.WebJobs;
using Microsoft.Azure.WebJobs.Extensions.Http;
using Microsoft.Azure.WebJobs.Host;

namespace reycrmtest
{
    public static class Function1
    {
        [FunctionName("Function1")]
        public static async Task<HttpResponseMessage> Run([HttpTrigger(AuthorizationLevel.Function, "get", "post", Route = null)]HttpRequestMessage req, TraceWriter log)
        {
            log.Info("C# HTTP trigger function processed a request.");
              // Get request body
                string data = await req.Content.ReadAsStringAsync();
            //log request body 
            log.Info(data);


            return req.CreateResponse(HttpStatusCode.OK);
           
        }
    }
}

6. Now rebuild the code > Right click on the project and click on publish >Click on start in Publish section.A dialog will pop up with azure license plan I am using consumption plan for my trial instance . Mark the create new check box and run from package as shown below.

You can select the plan as per your license , here i am using consumption plan for my trial instance.

7.Fill in the details as per your preferred choice.Click on create.This will take few minutes to deploy your function App on azure portal. (As this is the first time we are creating a Azure function we need to create a function App to deploy this function in the app the above steps were to create a function App).Once the process is completed it will start publish automatically.Now you can open Azure portal with same login credentials used in visual studio.

8. You can navigate to functions in azure portal from the left navigation drawer.As you can see in the below screenshot our reycrmtest App is created on Azure portal.
Click On your function App where you can see your test function is deployed.Refer below Screen shots.

Inside Function app function1 is enabled

9. Click On function1 to see function.json. It will be in readonly mode as we have deployed the function from Visual studio Cloud service .Get the function URL besides Run button and paste it on notepad.We will use this URL while registering Webhook.

Copy the URL and paste it in notepad

10. Now open PRT (plugin registration tool) and login to the instance where you want to register the webhook.

11. A new dialog will open with webhook details. Open Notepad file where you have pasted the URL of the function copied in STEP 9 .

Authentication options

The correct webhook registration authentication option and values to use depend on what the endpoint expects. The owner of the endpoint must tell you what to use. To use webhooks with Dynamics 365, the endpoint must allow one of the three authentication options described below:

TypeDescription
HttpHeaderIncludes one or more key values pairs in the header of the http request.
Example:
Key1: Value1
Key2: Value2
WebhookKeyIncludes a query string using code as the key and a value required by the endpoint. When registering the web hook using the Plug-in Registration tool, only enter the value.
Example:
?code=00000000-0000-0000-0000-000000000001
HttpQueryStringIncludes one or more key value pairs as query string parameters.
Example:
?Key1=Value1&Key2=Value2

https://reycrmtest.azurewebsites.net/api/Function1?code=Y4a0tWmc39ZLyPhPZFMmAPcfa3CNyHKOZi4mHvjeHYzMJIM5u5OYfg==

The part in code (marked in bold, remove ‘code=’) will be your webhook key and Endpoint url will be upto ‘?’ .Please refer below screen shot.

FIll in the details

Register a step for a webhook

Registering a step for a webhook is like registering a step for a plugin. The main difference is that you cannot specify any configuration information.

Just like a plugin, you specify the message, and information about entities when appropriate. You can also specify where in the event pipeline to execute the web hook, the execution mode and whether to delete any AsyncOperation when the operation succeeds.Refer below screent shot.

Right Click on webhook and click on register new step
Registering the step in Asynchronous mode

Create Record in CRM instance

Now navigate to the CRM instance and create (or perform the step as per your registration) a record. I have created a contact record in my instance as shown below.

Create a record as per the triggerof your step.

Once I create a contact record the webhook gets triggered and CRM httprequest is passed in the azure function.You can check the trigger in System Events if the step is registered in async mode same as for plugins.

Azure Function Logs

Azure functions provides us with logging feature. To check these logs you can navigate to the Azure portal where we have registered the function App as in Step 8.
Refer below screenshot

Click on monitor in your function to track the triggered events of your function. We can see all the logs as below.

  log.Info("C# HTTP trigger function processed a request.");
  string data = await req.Content.ReadAsStringAsync();
  log.Info(data);

As per the above code in our azure function we are logging “C# HTTP trigger function processed a request.” and the request body which contains all the parameters of the Created record in crm & logs are available in the logs section in the bottom right corner as shown in the above screenshot. This shows the connection of azure function with ms crm using webhooks. I will be demonstrating how to use the json object in our code for CRUDE operation using executioncontext in my next blog.
Hope it helps …………………………… 🙂 Do share it !!!!