

In this blog I will try to demonstrate how we can implement Continuous Integration (CI) and Continuous Deployment (CD) for Dynamics 365 Customer Engagement CRM (CE) using Azure DevOps. We will see how we can deploy a CRM Solution from one CRM instance to another CRM instance, let us say, we have to deploy a CRM solution from the development environment to the QA / UAT environment.
To demonstrate this we will require following component/ Subscriptions
- Azure Devops.
- 2 CRM instances.
- Power DevOps Tools .
Lets start by navigating to azure portal https://dev.azure.com/.
Create a new project .

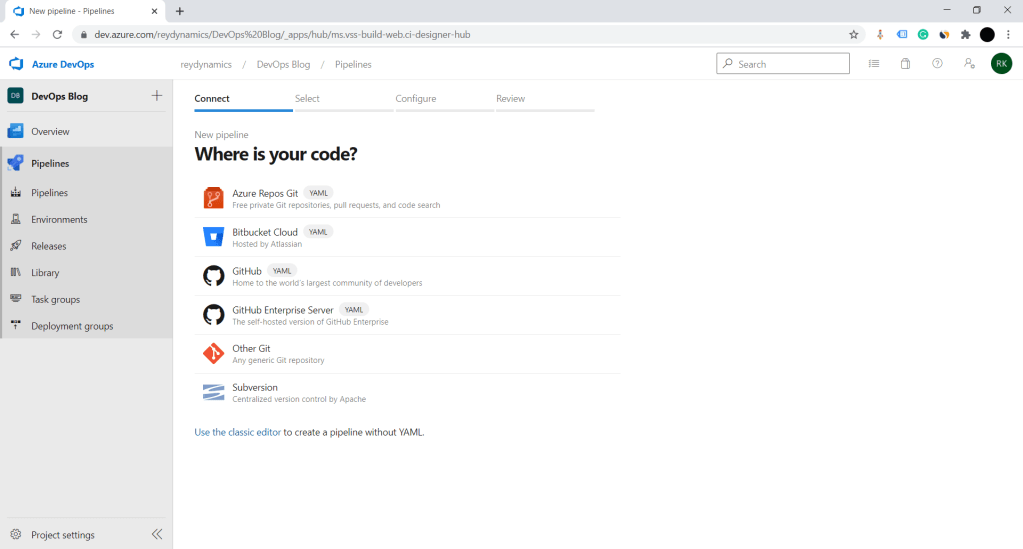
- Click on use classic editor . Select Azure repos Git as source .


2. Select empty job as shown in above image.
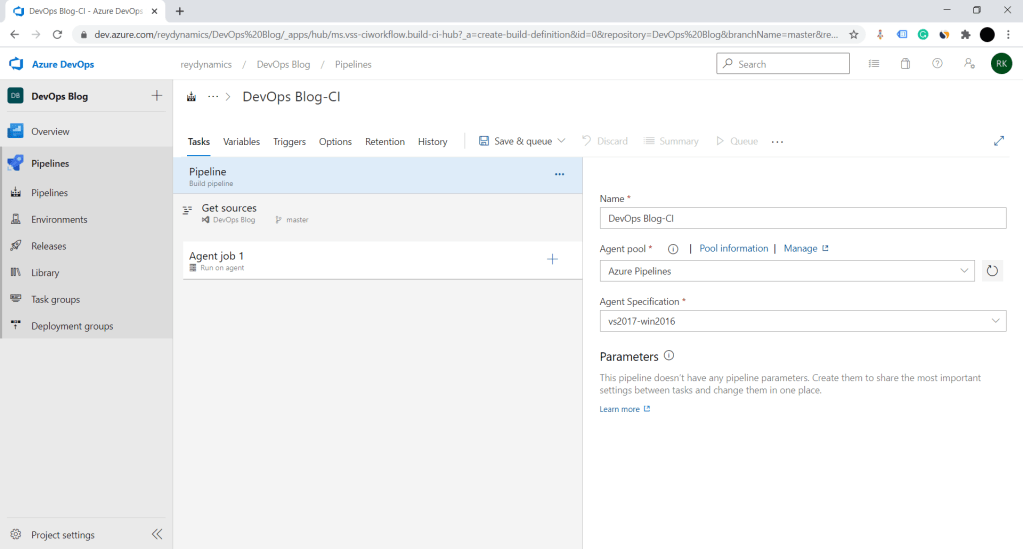
3. Fill in the agent job details as shown in above screenshot.

4. Click on Plus(+) button to add new task to a agent.

5. Add power platform tool installer . Please if power apps component aren’t visible install Power Devops tool from market place .

6. Next step for agent job is to export the solution . Select Power platform Export solution component .

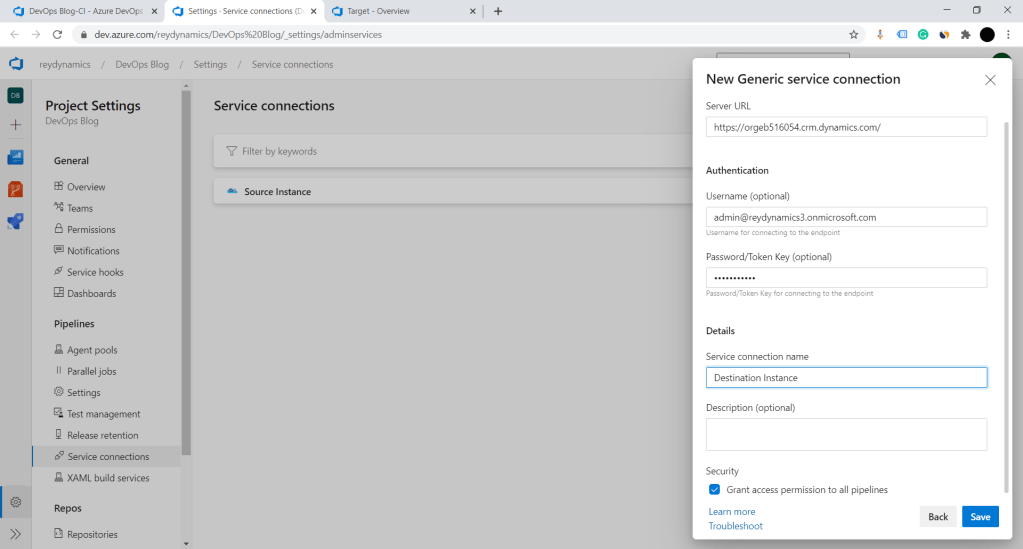
7. Configure Powerapps export solution . We need to add connection for our CRM instance. Click on manage in service connection , you will land on service connection page . Add new generic service connection.


8. Please note to Grant access permission to all the pipelines and save the connection.
Lets create Destination connection also for the destination instance.
9. The above created connections will be available in the service connection dropdown. Select source connection for export solution component .
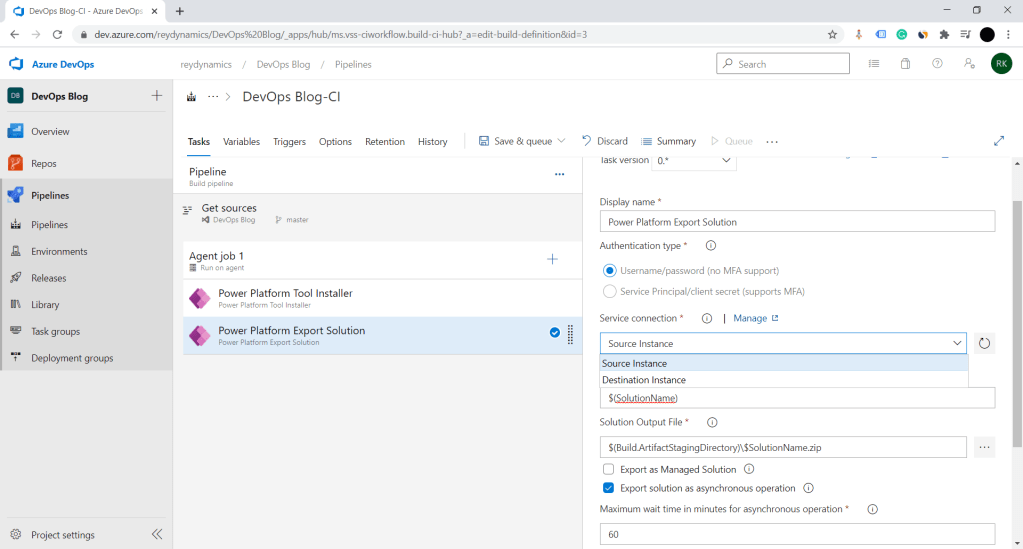
10. Fill in the other details as shown in above screen shot . $SolutionName will be our variable where we will configure the solution name to be exported. Solution output file $(Build.ArtifactStagingDirectory)\$SolutionName.zip will be the destination artifact where the solution will be stored after export.
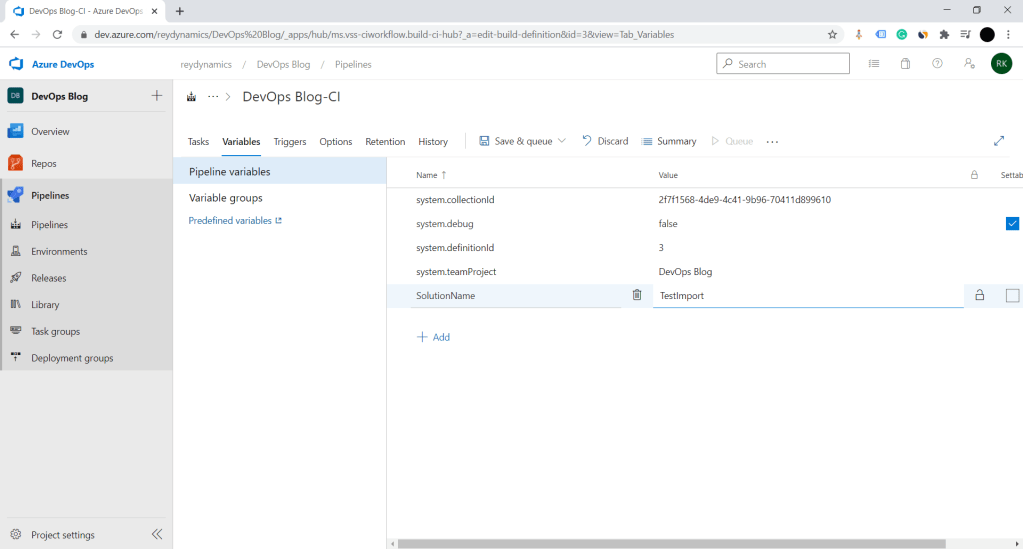
11. On the top menu bar select Variable > Add new variable as shown in below screen shot . Set the solution name as value for the variable . Increase the asynchronous wait time.

12. Add Power platform Import solution component to import the exported solution in the target instance.

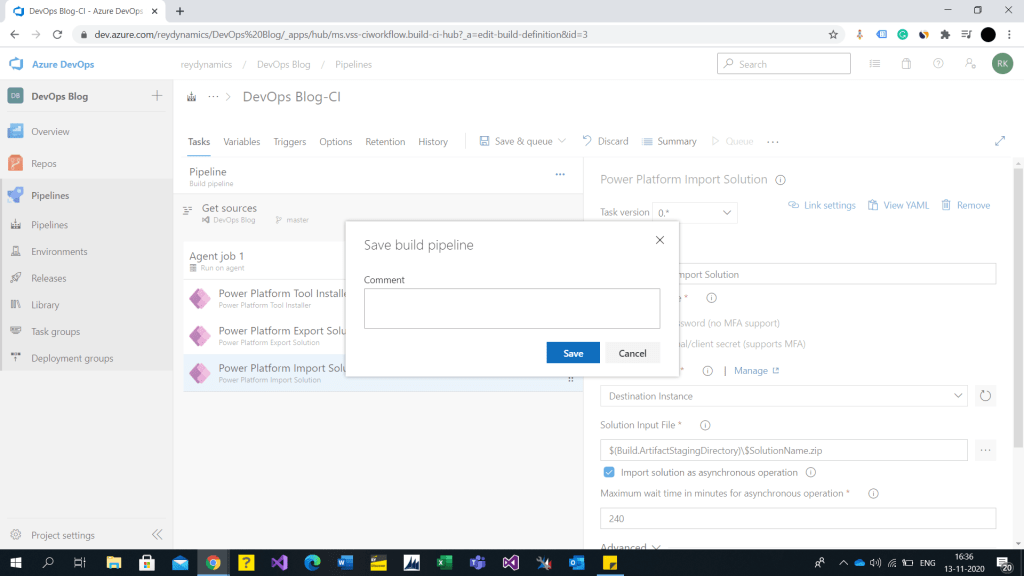
13. Save the azure job . Please ensure solution name passed in variable is created in source instance . Below is the source solution .


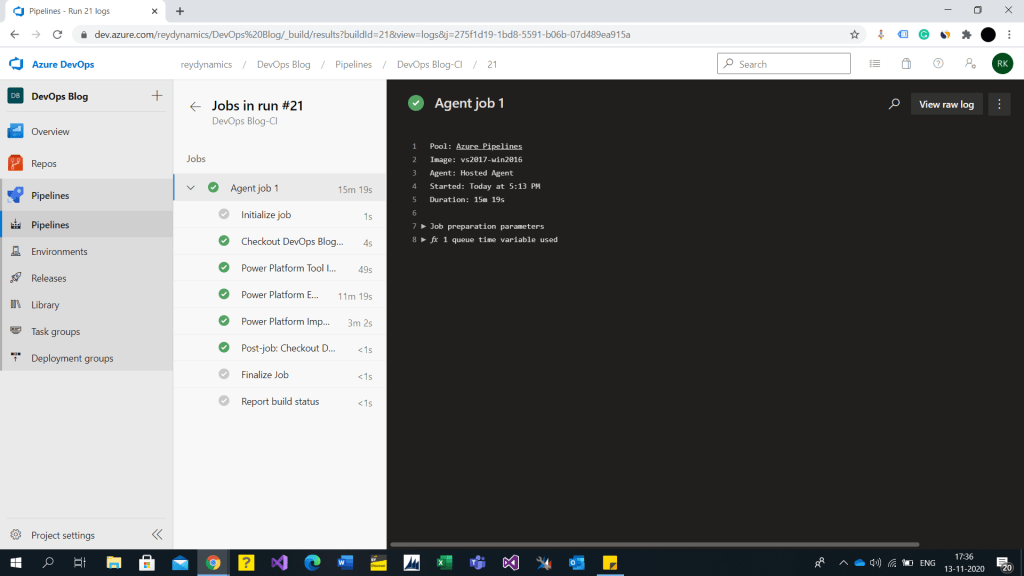
14. Below is the screenshot of destination instance. Lets execute this pipeline . Click on queue under azure pipeline. Note: you might face an error with respect to azure repository access . Please enable the respos for the project as shown below .


Hope this helps….. Thanks for reading . Good Luck.
Follow me on my Linked In.

One thought on “Azure DevOps CI/CD pipeline for unmanaged solution Dynamics CRM.”