
In today’s blog, we are going to see how we can create HTTP requests using the power automate trigger. We can use this trigger to create a custom API that accepts JSON requests as input.
API URL created from this trigger doesn’t require any kind of authentication, hence the URL needs to be private and shared only with a required audience.
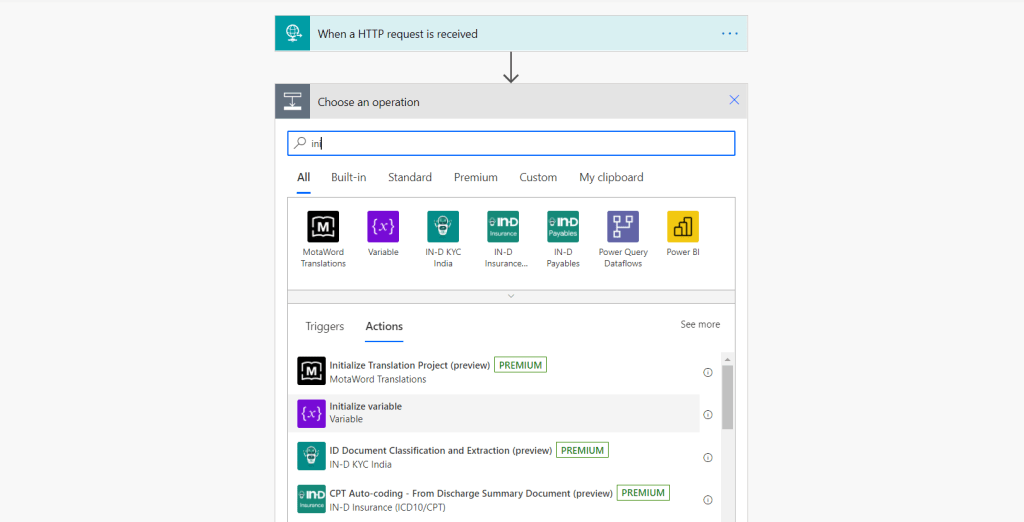
Lets start creating a new Flow .


HTTP request is received is a trigger that is responsive and can be found in the ‘built-in’ trigger category under the ‘Request’ section. This is a responsive trigger as it responds to an HTTP Request and thus does not trigger unless something requests it to do so.
Let’s consider a business requirement of lead creation API with a deduplication check.
So there are many business scenarios where lead is created through external channels consuming CRM WEB API. In this API we will create a lead in CRM with a dedupe check of mobile and email id. We are considering this scenario to show the benefit of a custom HTTP trigger over an out-of-the-box WEB API.
Breakdown of steps to demonstrate this-
- Fetch product based on name and save it in a variable.
- Check duplicate records in Lead with a combination of phone and email.
- If the lead record is found, API will return a response with a duplicate record found.
- If there is no lead record found, we will create a new lead record and return the response lead created.


In the above image, I have created a basic JSON schema required to create a lead. Please note these JSON attributes are custom, you can name them at your convenience. Click on Done when you have pasted the JSON.
The next step is to initialize a variable. We will use this variable to store the product ID as we are going to pass the product name in the JSON request.


The next step is to list the product on the basis of name. We will need this GUID to create a lead record.

In the above image, we are filtering on the basis of the products of the name of the product received in JSON. Please refer to the below screenshot for the same.
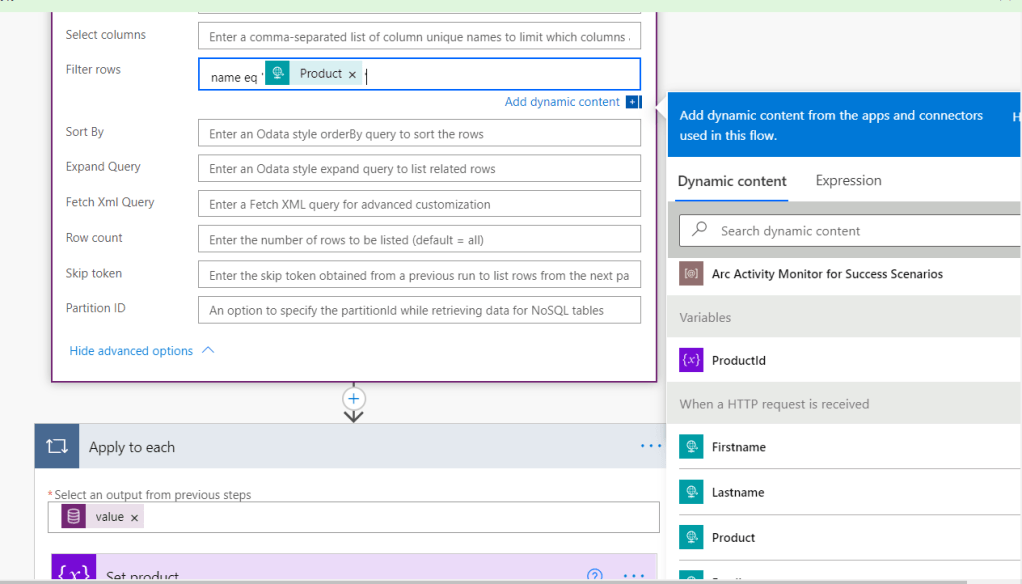


Apply To Each Control is used to loop through all the records fetched from List records. As we are expecting only one product record we will set the product id of that record in our variable. Refer to the screenshot below.

Pass the value from the List records component.
Now under apply to each condition, we will set the product ID variable. For that choose the Set variable component.

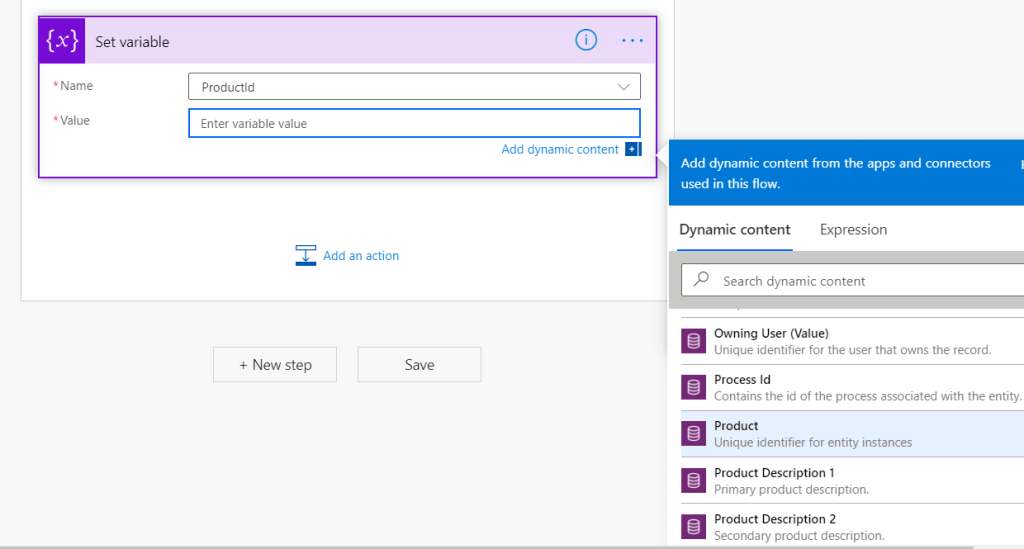
Select product unique identifier from List records. Our flow will look like as shown below.

Now Add another List record component to check the lead deduplication logic. We will add the required filter for the dedupe which is a combination of email and mobile phone. This filter will check the duplicate records in leads.
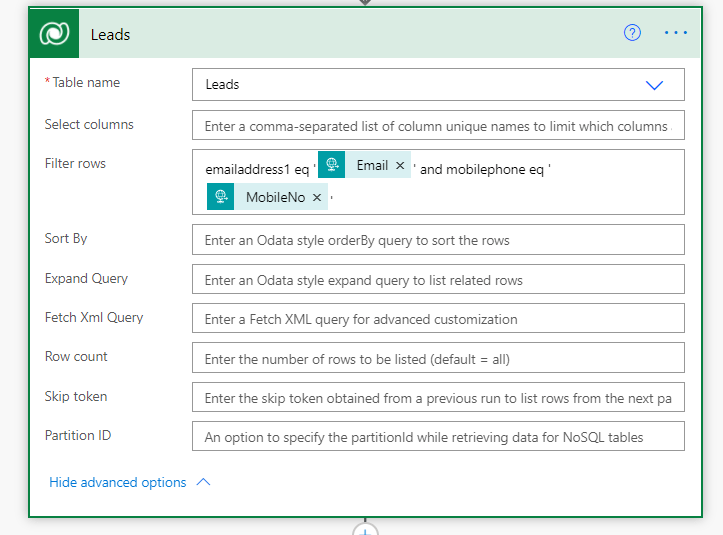
We have passed the parameters from the HTTP request trigger. The next step is to add a condition that will check if the list records of lead return any record.
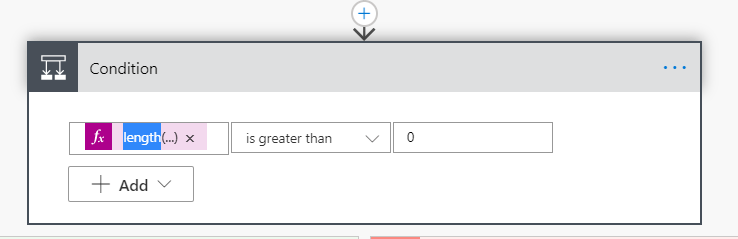
This expression will return the length of object returned length(body(‘Leads’)?[‘value’]).
As seen in the fetch leads screenshot, the name for the component is Leads which is passed in the expression. So here I am checking if the length of an object is greater than 0.
If it is greater than zero, it indicates that a record already exists with the same phone no and email address. In this case, we will return the JSON response as “Lead is already created”.
Inside yes condition add select component as shown below .


Data Operation – Select action is used to transform the shape of objects in an array. For example, you can add, remove, or rename elements in each object in an array.
In the above select component, we are passing the value from the List row of lead. As you can see values are mapped with my custom key attributes Leadid , Duplicate and Message. The output from the select component will be used in response.

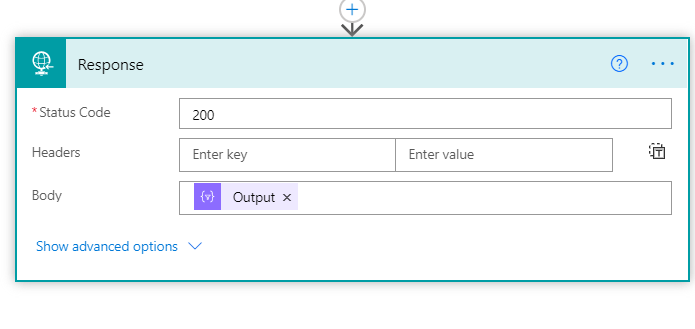
Select the output under select component in the response body as shown in the above screenshot.

The next step is to add a condition when a duplicate record is not found. Here we will create a lead record and pass the same Keys with different values. Add new action Add a new Row dataverse under no condition.
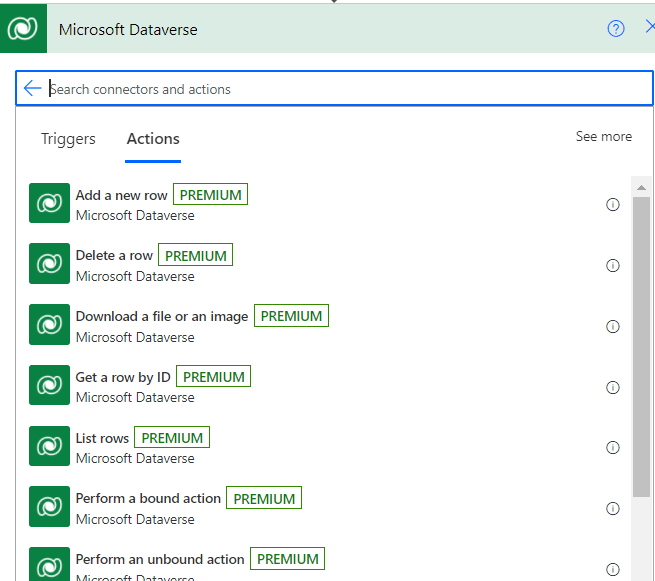


Now we are mapping the HTTP request parameters with CRM lead entity. Refer to the above screenshots for the same. We are passing the product ID variable defined earlier as this connector requires a GUID of lookup to bind. Once we map all the HTTP request parameters next step is to add a response.

Response Action will be added returning the following parameters Leadid, Duplicate, Message as shown in the above screenshot.

This is how our conditional part of flow will look like .

Let’s test this HTTP Request in postman. When we save this Flow a URL will be generated in the HTTP request trigger. We will use the same URL to consume this API.
Please refer to the screenshots below.

As you can see below screenshot all the parameters are passed as per our defined JSON and API responded with the parameters we configured for an HTTP response.


Lead created in CRM with all the fields passed in the request. As you can see even the product lookup is filled.
Now I will try to create a lead with the same details to check if the request allows me to create the duplicate lead.

As you can see HTTP request didn’t allow us to create a new lead and returned us the message “Lead is already created”.
This is how we can implement custom business logic in the HTTP requests to overcome different business requirements.
Thanks for reading. Hope this helps.
Follow me on Linkedin.

One thought on “Create Custom Http Requests using Power Automate”